
Hungry Hollow Happenings: January 2024
This newsletter goes out to email inboxes monthly(ish). To receive future letters in your inbox, click the button below:

January 2024
Before welcoming the winter season, we had a few projects needing attention. The biggest one, outside the scope of our normal annual tasks, was an irrigation infrastructure project.
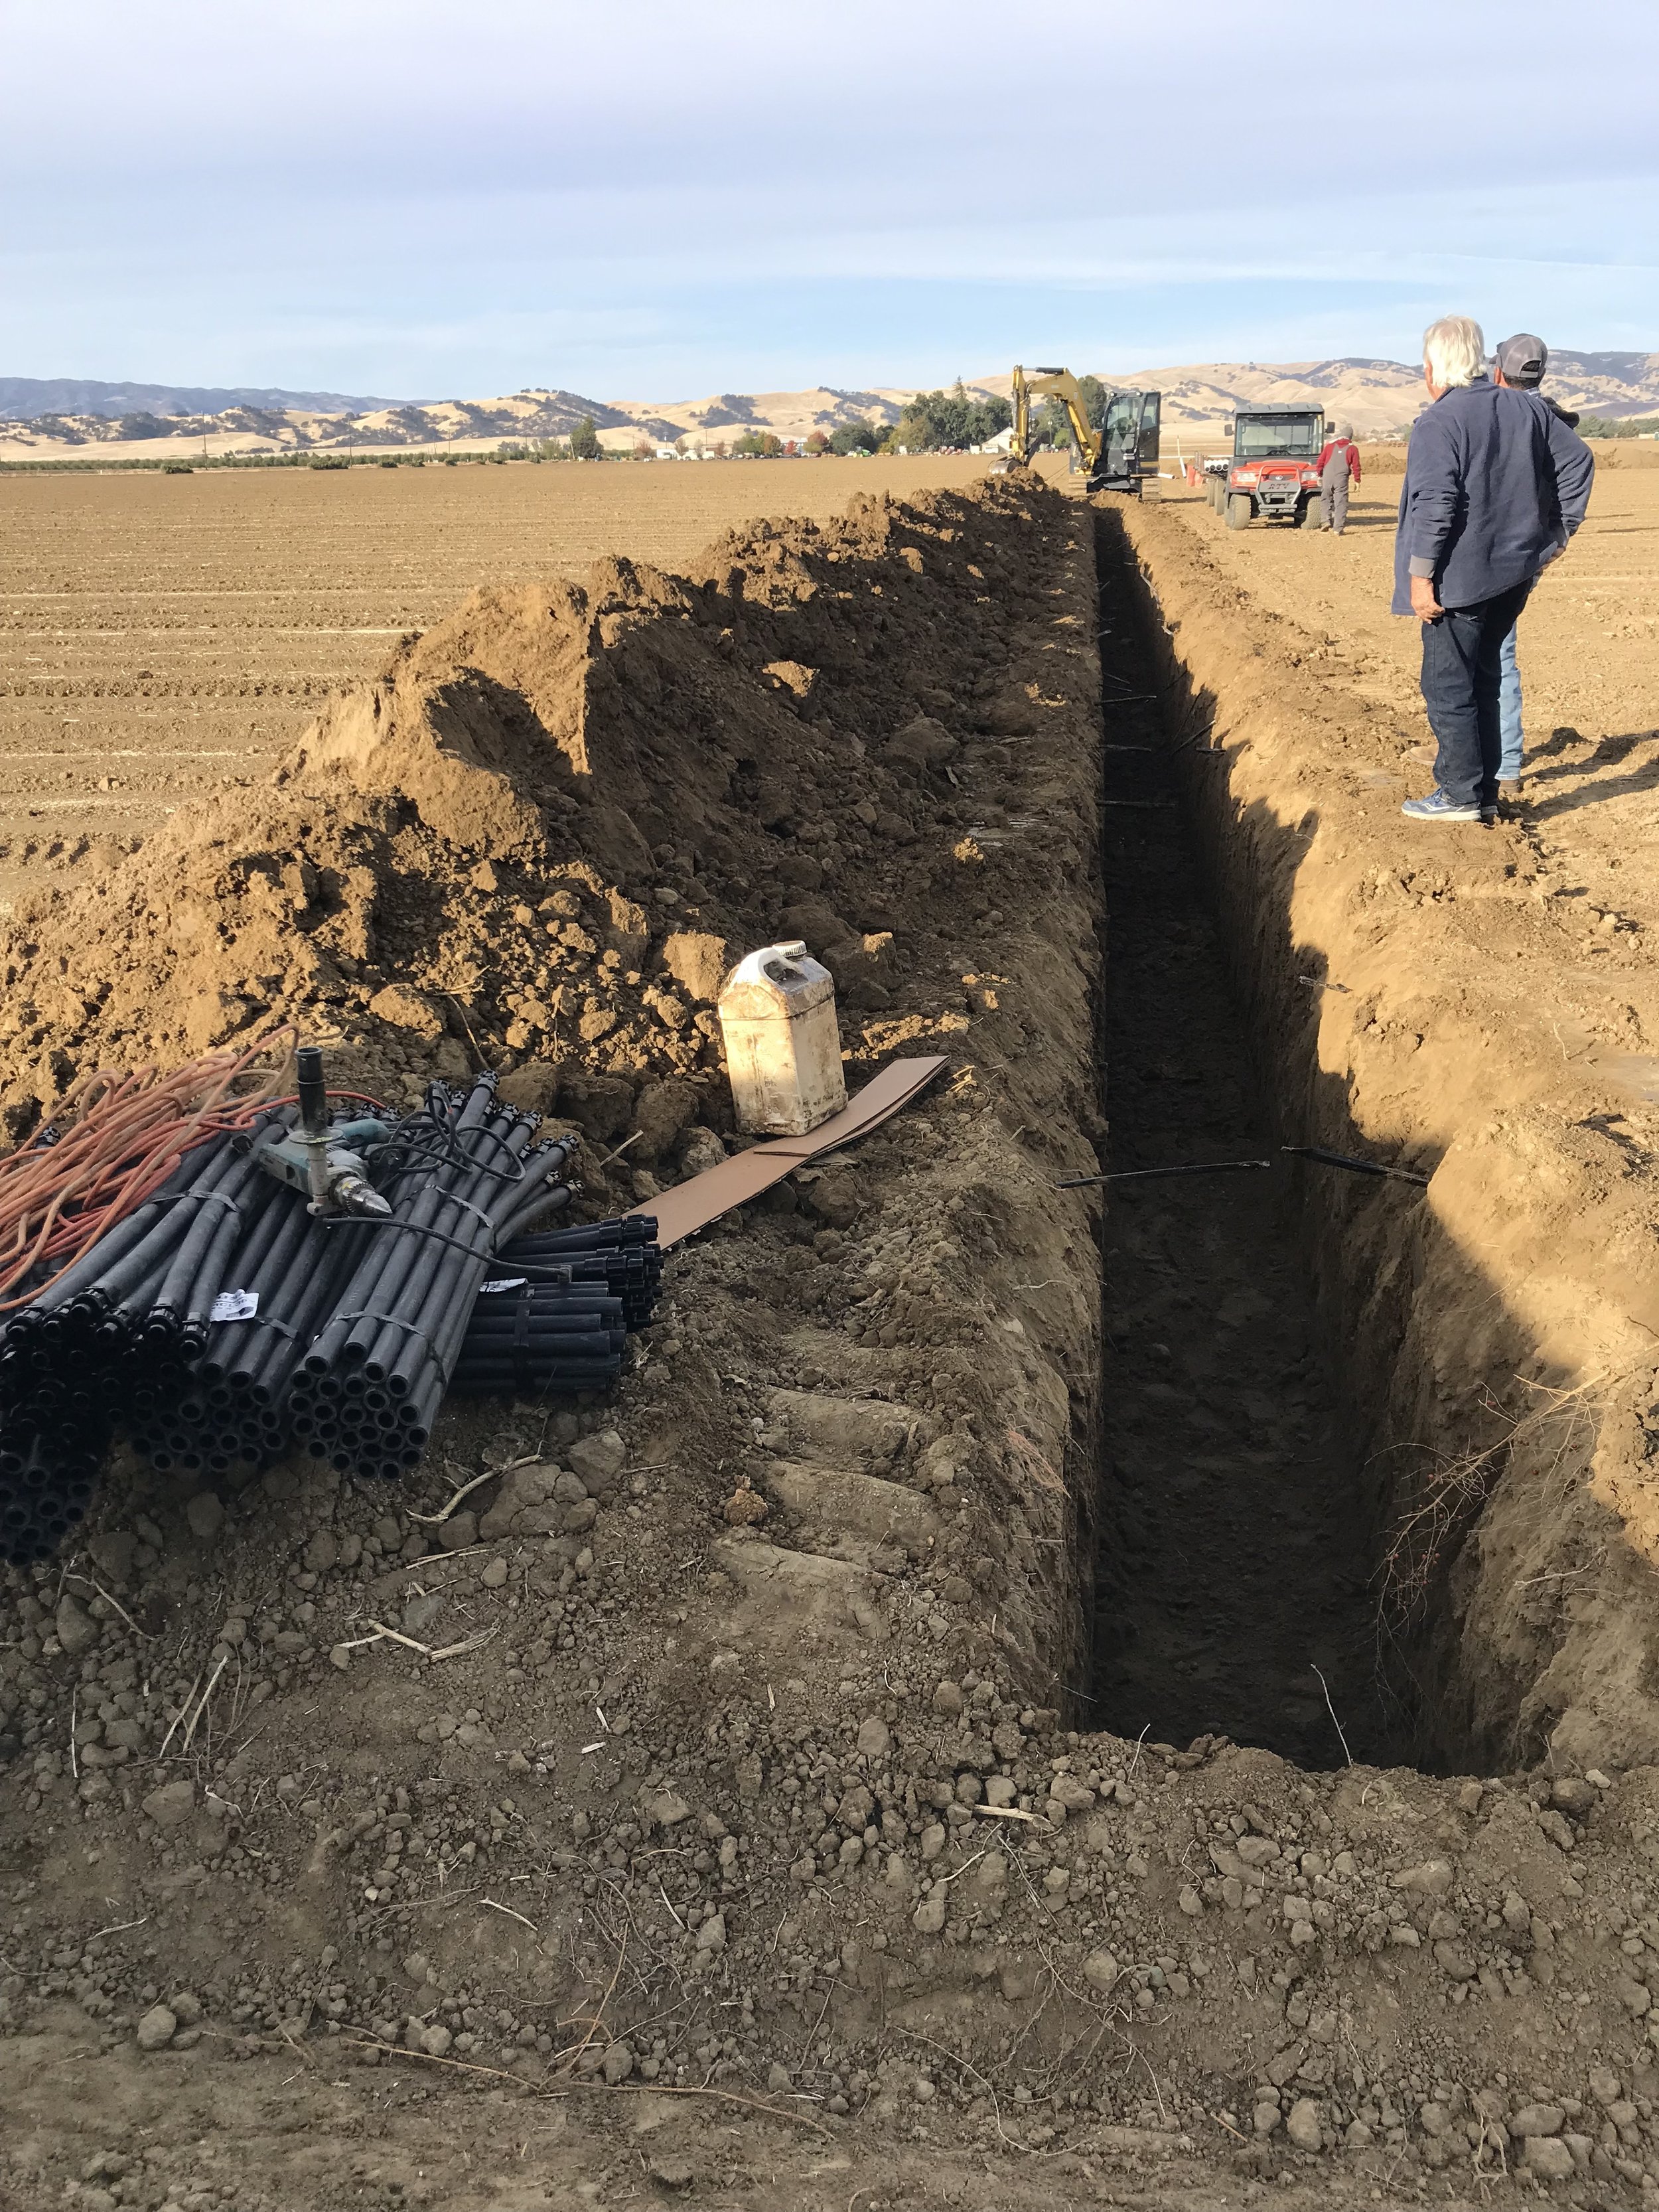
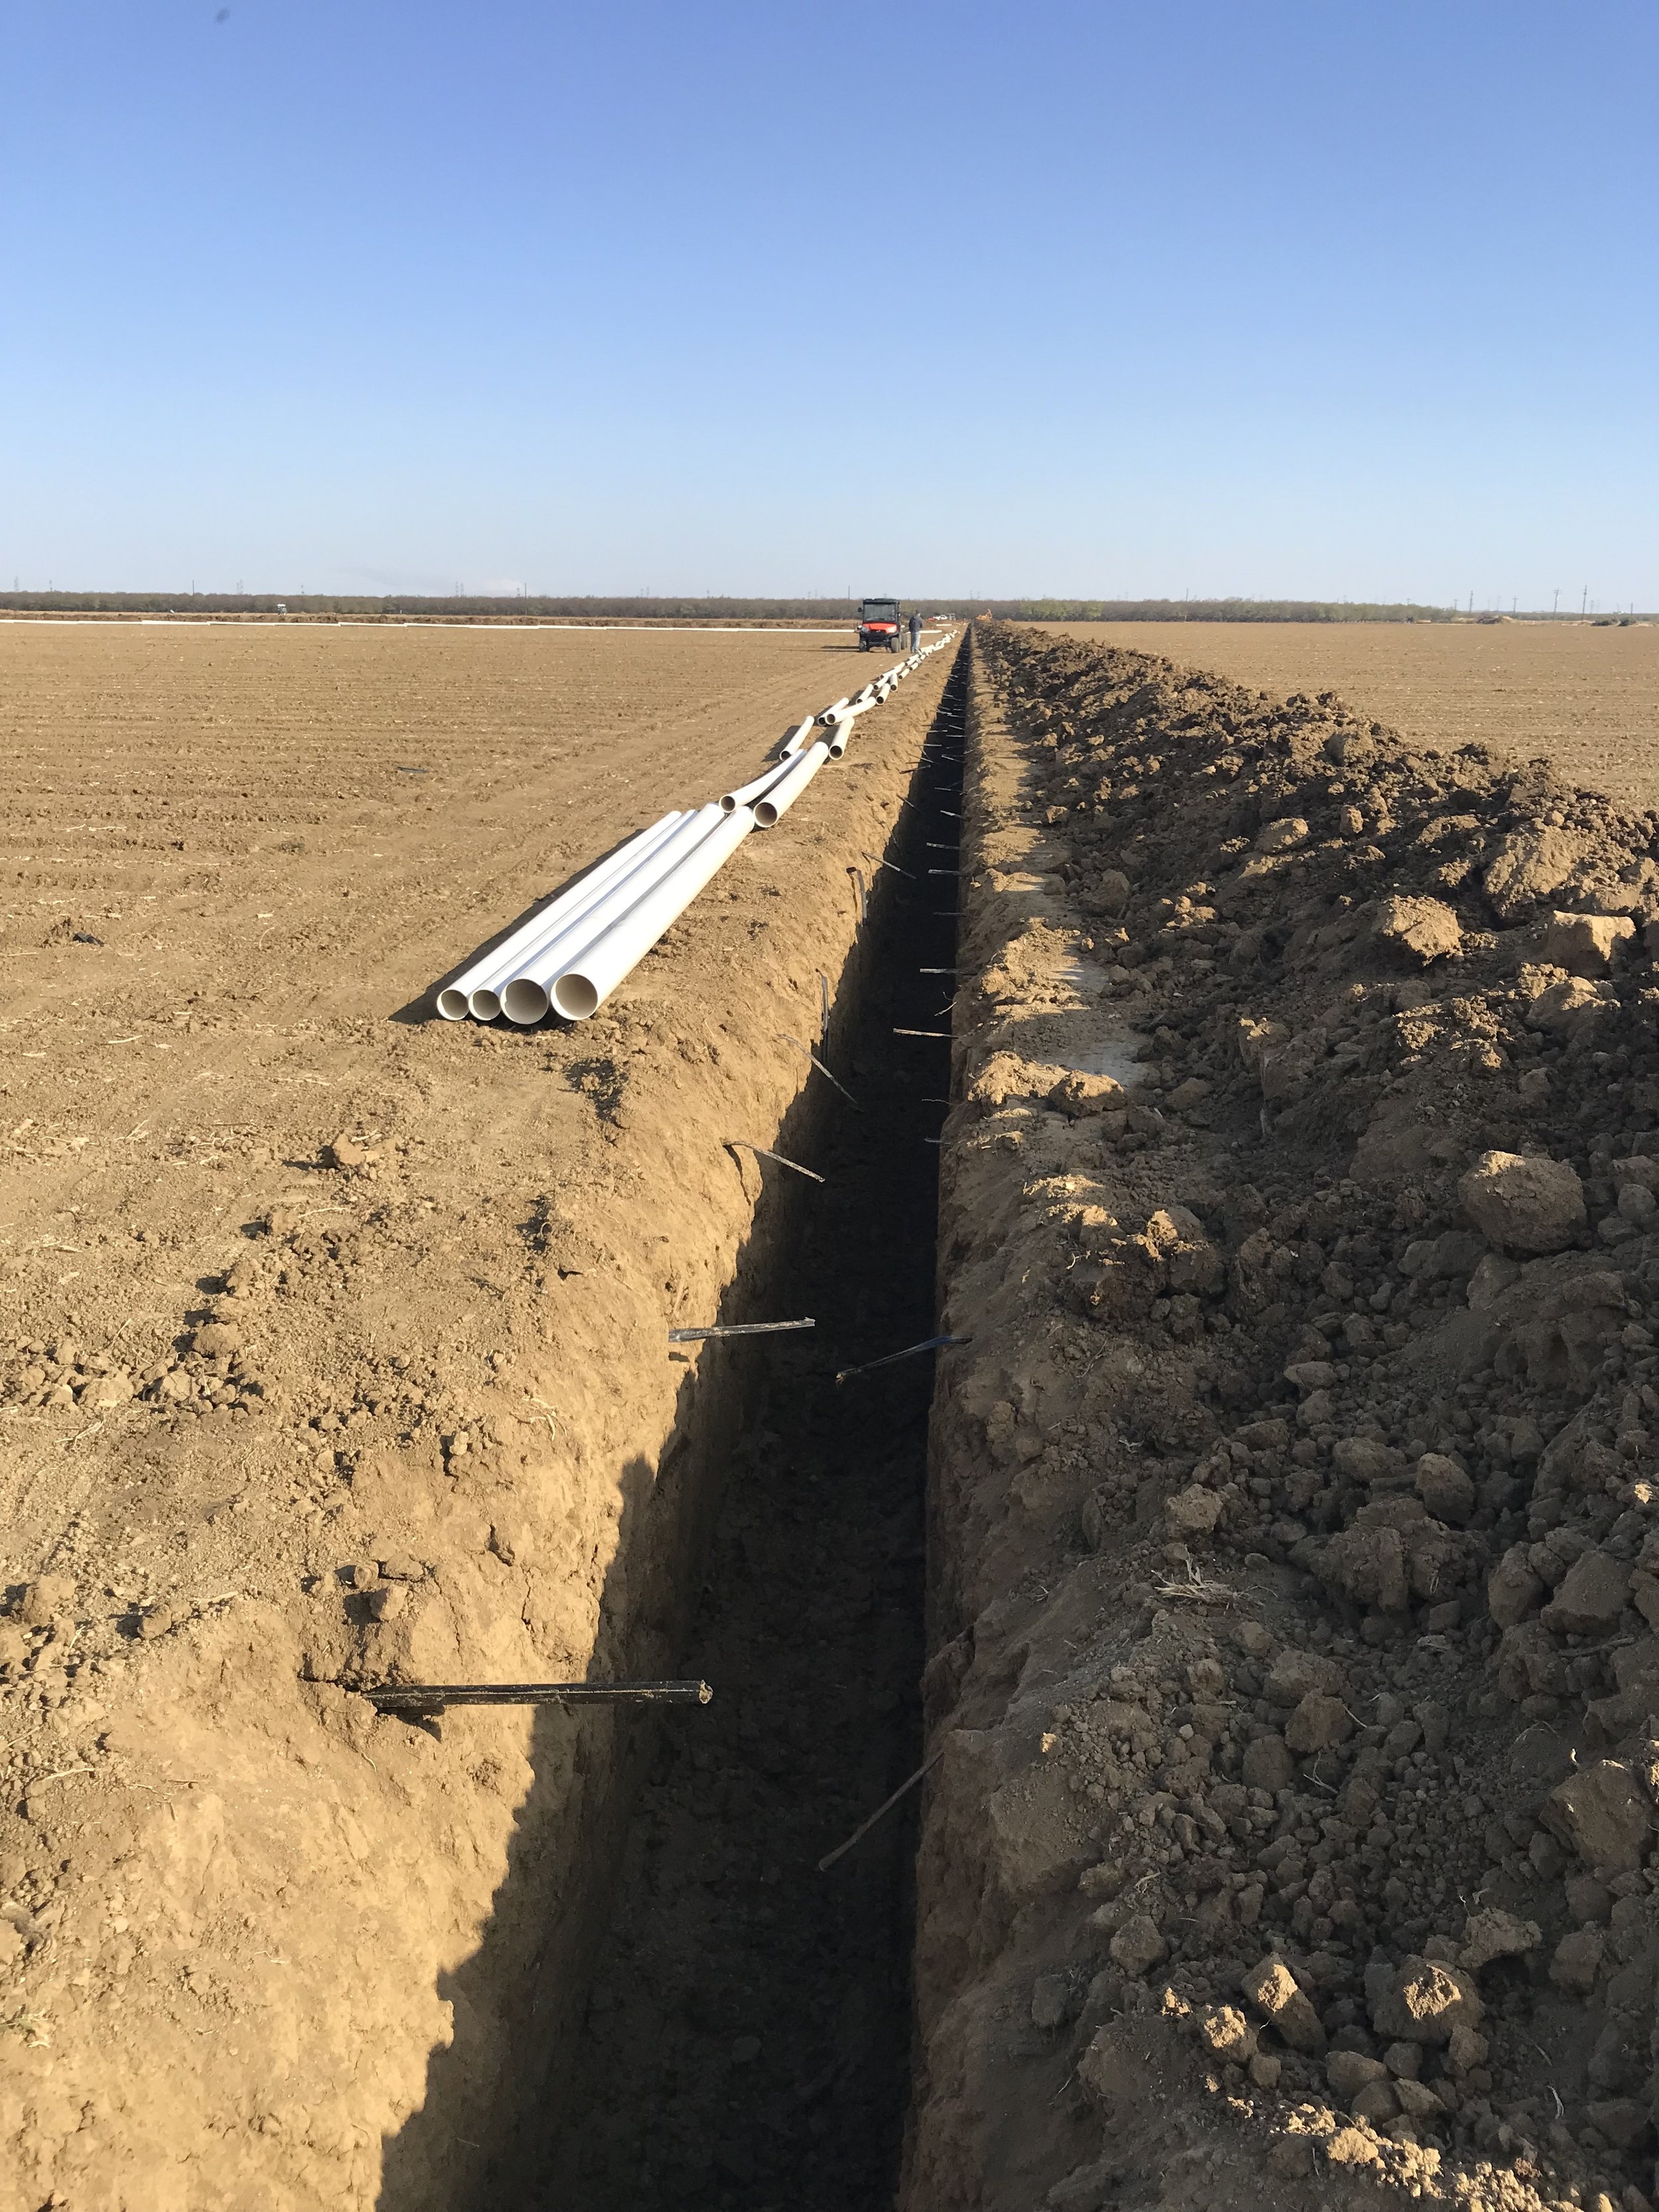
As we ushered out our summer crops in preparation for winter and the seasons beyond, we installed a new irrigation main line, finishing just in time before the first rains. Getting this done before the rain was important because the project required digging a large trench through the middle of our field – something we wouldn’t want to do if the soil was wet (plus, we needed to complete this before we could plant our cover crop – another task we try to get done before the rain begins!).
A main line refers to the pipe system that delivers water from the source (in our case, pumps that pull from either wells or canal water) to the end-use system (in this situation, buried drip tape). On our farm, the main lines are made up of PVC piping and are completely underground (exceptions being the vents, valves, and outlets that connect to or from the main line). Having the system underground allows for ease of movement throughout the farm – no worrying about moving pipes or blocked roads – and likely helps the longevity of the system, as well (no sun/elemental exposure or risk of getting run over!). Some of the mainlines end at outlets that can feed our aluminum piping used for overhead or flood irrigation, while others service our underground drip system.
Most of our irrigation is done using underground (buried) drip tape. Drip tape comes in varying sizes, both in relation to the spacing between the holes (emitters), size of the emitters, width of the tape, and thickness of the material. These factors affect the flow of the water (high vs. low), how far you can run a line (as in the length of a bed), and the duration of use (how long it will last before degrading). Thus, you’d select for these factors based around how strong your pump is, what you’re irrigating, how far you’re running the lines, and how long you want to keep the tape in the ground.
Despite all these variables and options for selecting drip tape, we have found that in some of our fields, the beds are just too long (over 1000 ft.) to maintain even pressure and flow down the full length of run. The result is inefficient (and sometimes ineffective) irrigating. For the water to effectively reach and soak into the ends of these longer rows, we end up over-irrigating the beginnings of the rows and have also seen uneven watering throughout the lengths of the beds over long periods of time. So, to remedy this, we added in a second main line halfway down the length of the beds to cut the distance the drip tape will service in half. Which brings us back to the main line project!
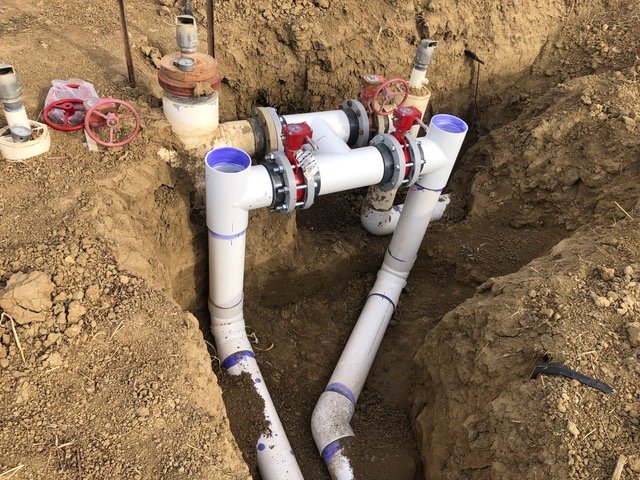
To install the mainline, we first added two new valves to each existing header manifold and then dug a series of connected 4 ft deep trenches. Although the drip tape is just 12” below the soil surface, the mainline is buried deeper to protect it from getting cracked or damaged by tractors or equipment working above ground.
Beginning at each existing header manifold, we dug a trench extending down half the length of the field (parallel to the beds); the piping we install in these trenches does not connect to any drip lines, but instead will feed the new mainline. At the halfway point, we dug one long trench going all the way across the field (perpendicular to the trenches coming from the headers — this lateral line will connect to the drip tape).
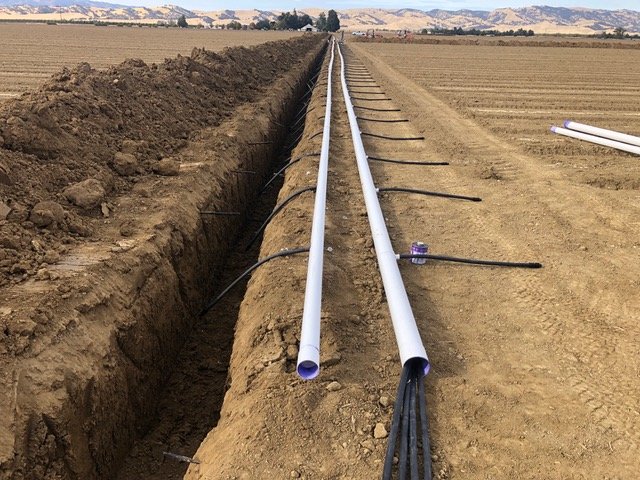
The PVC pipe comes in 20 ft lengths that all need to be glued together. We use pipe ranging in diameter from 6 inches at the beginning of the line to 3 inches at the end of the line in order to maintain even pressure and flow as the pipe gets farther away from the pump.
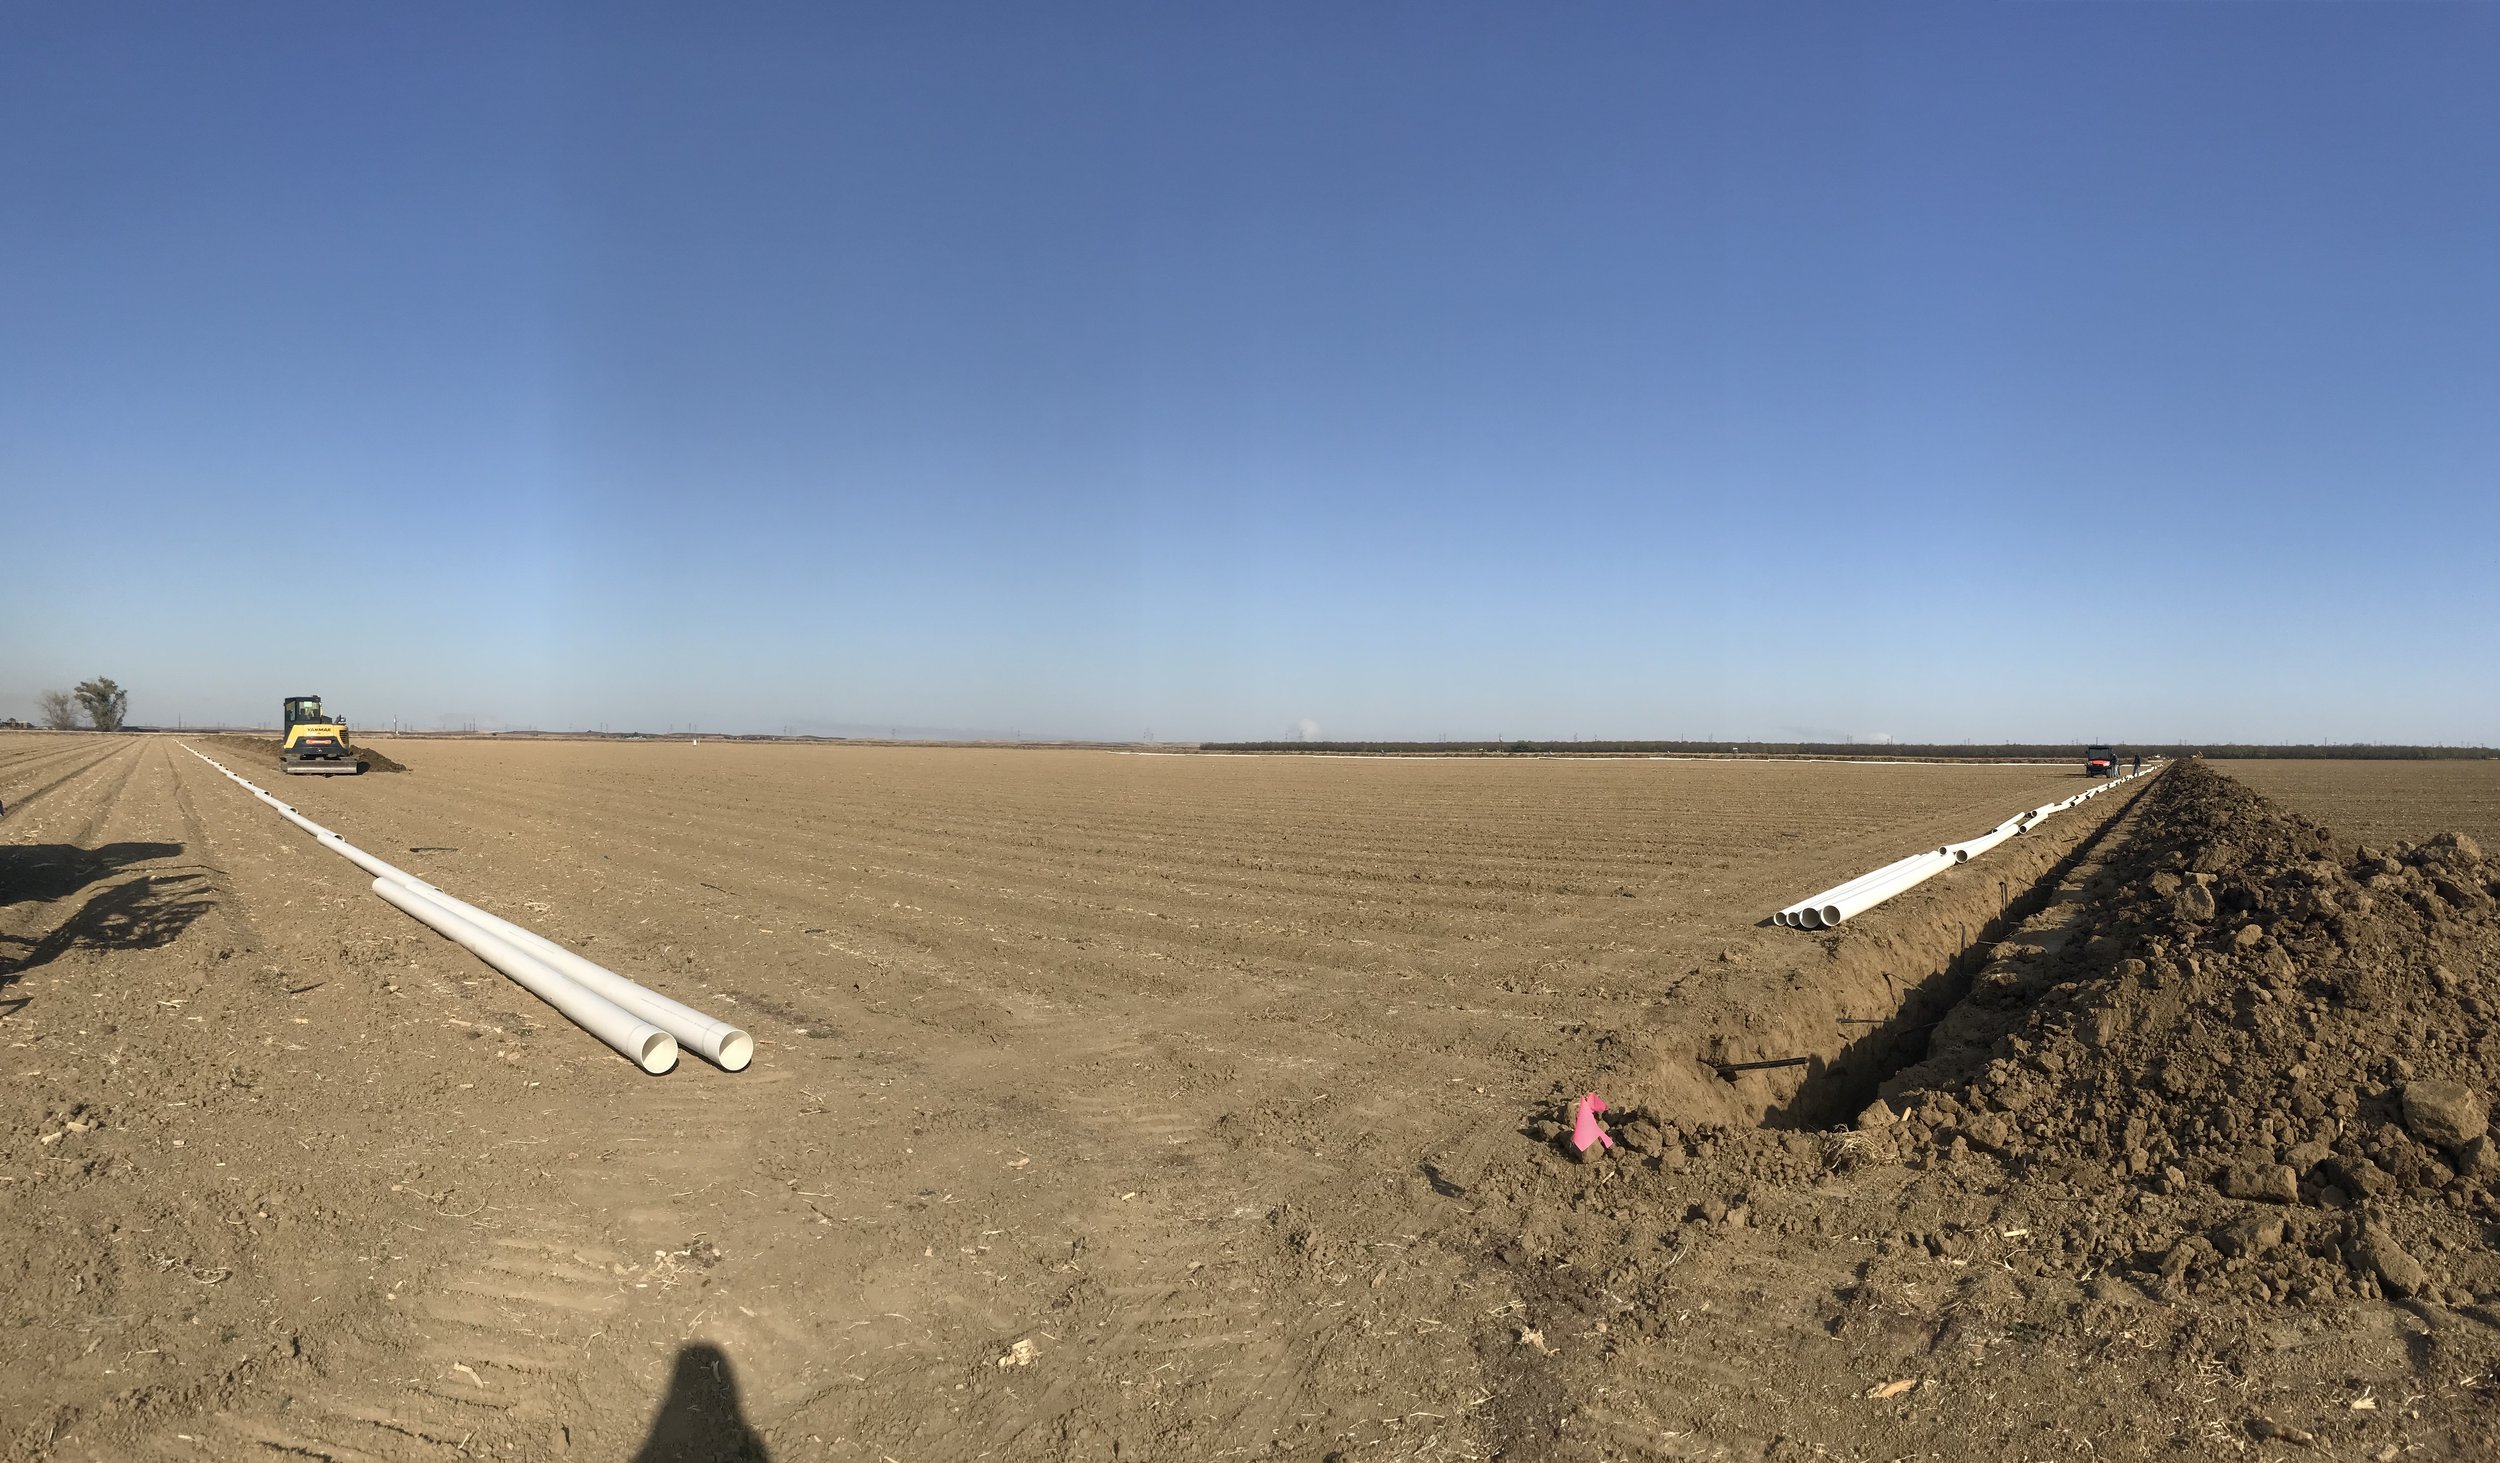
After we have the pipe laid out and glued together on top of the ground, we drill holes into the pipe where we will eventually connect the drip tape.
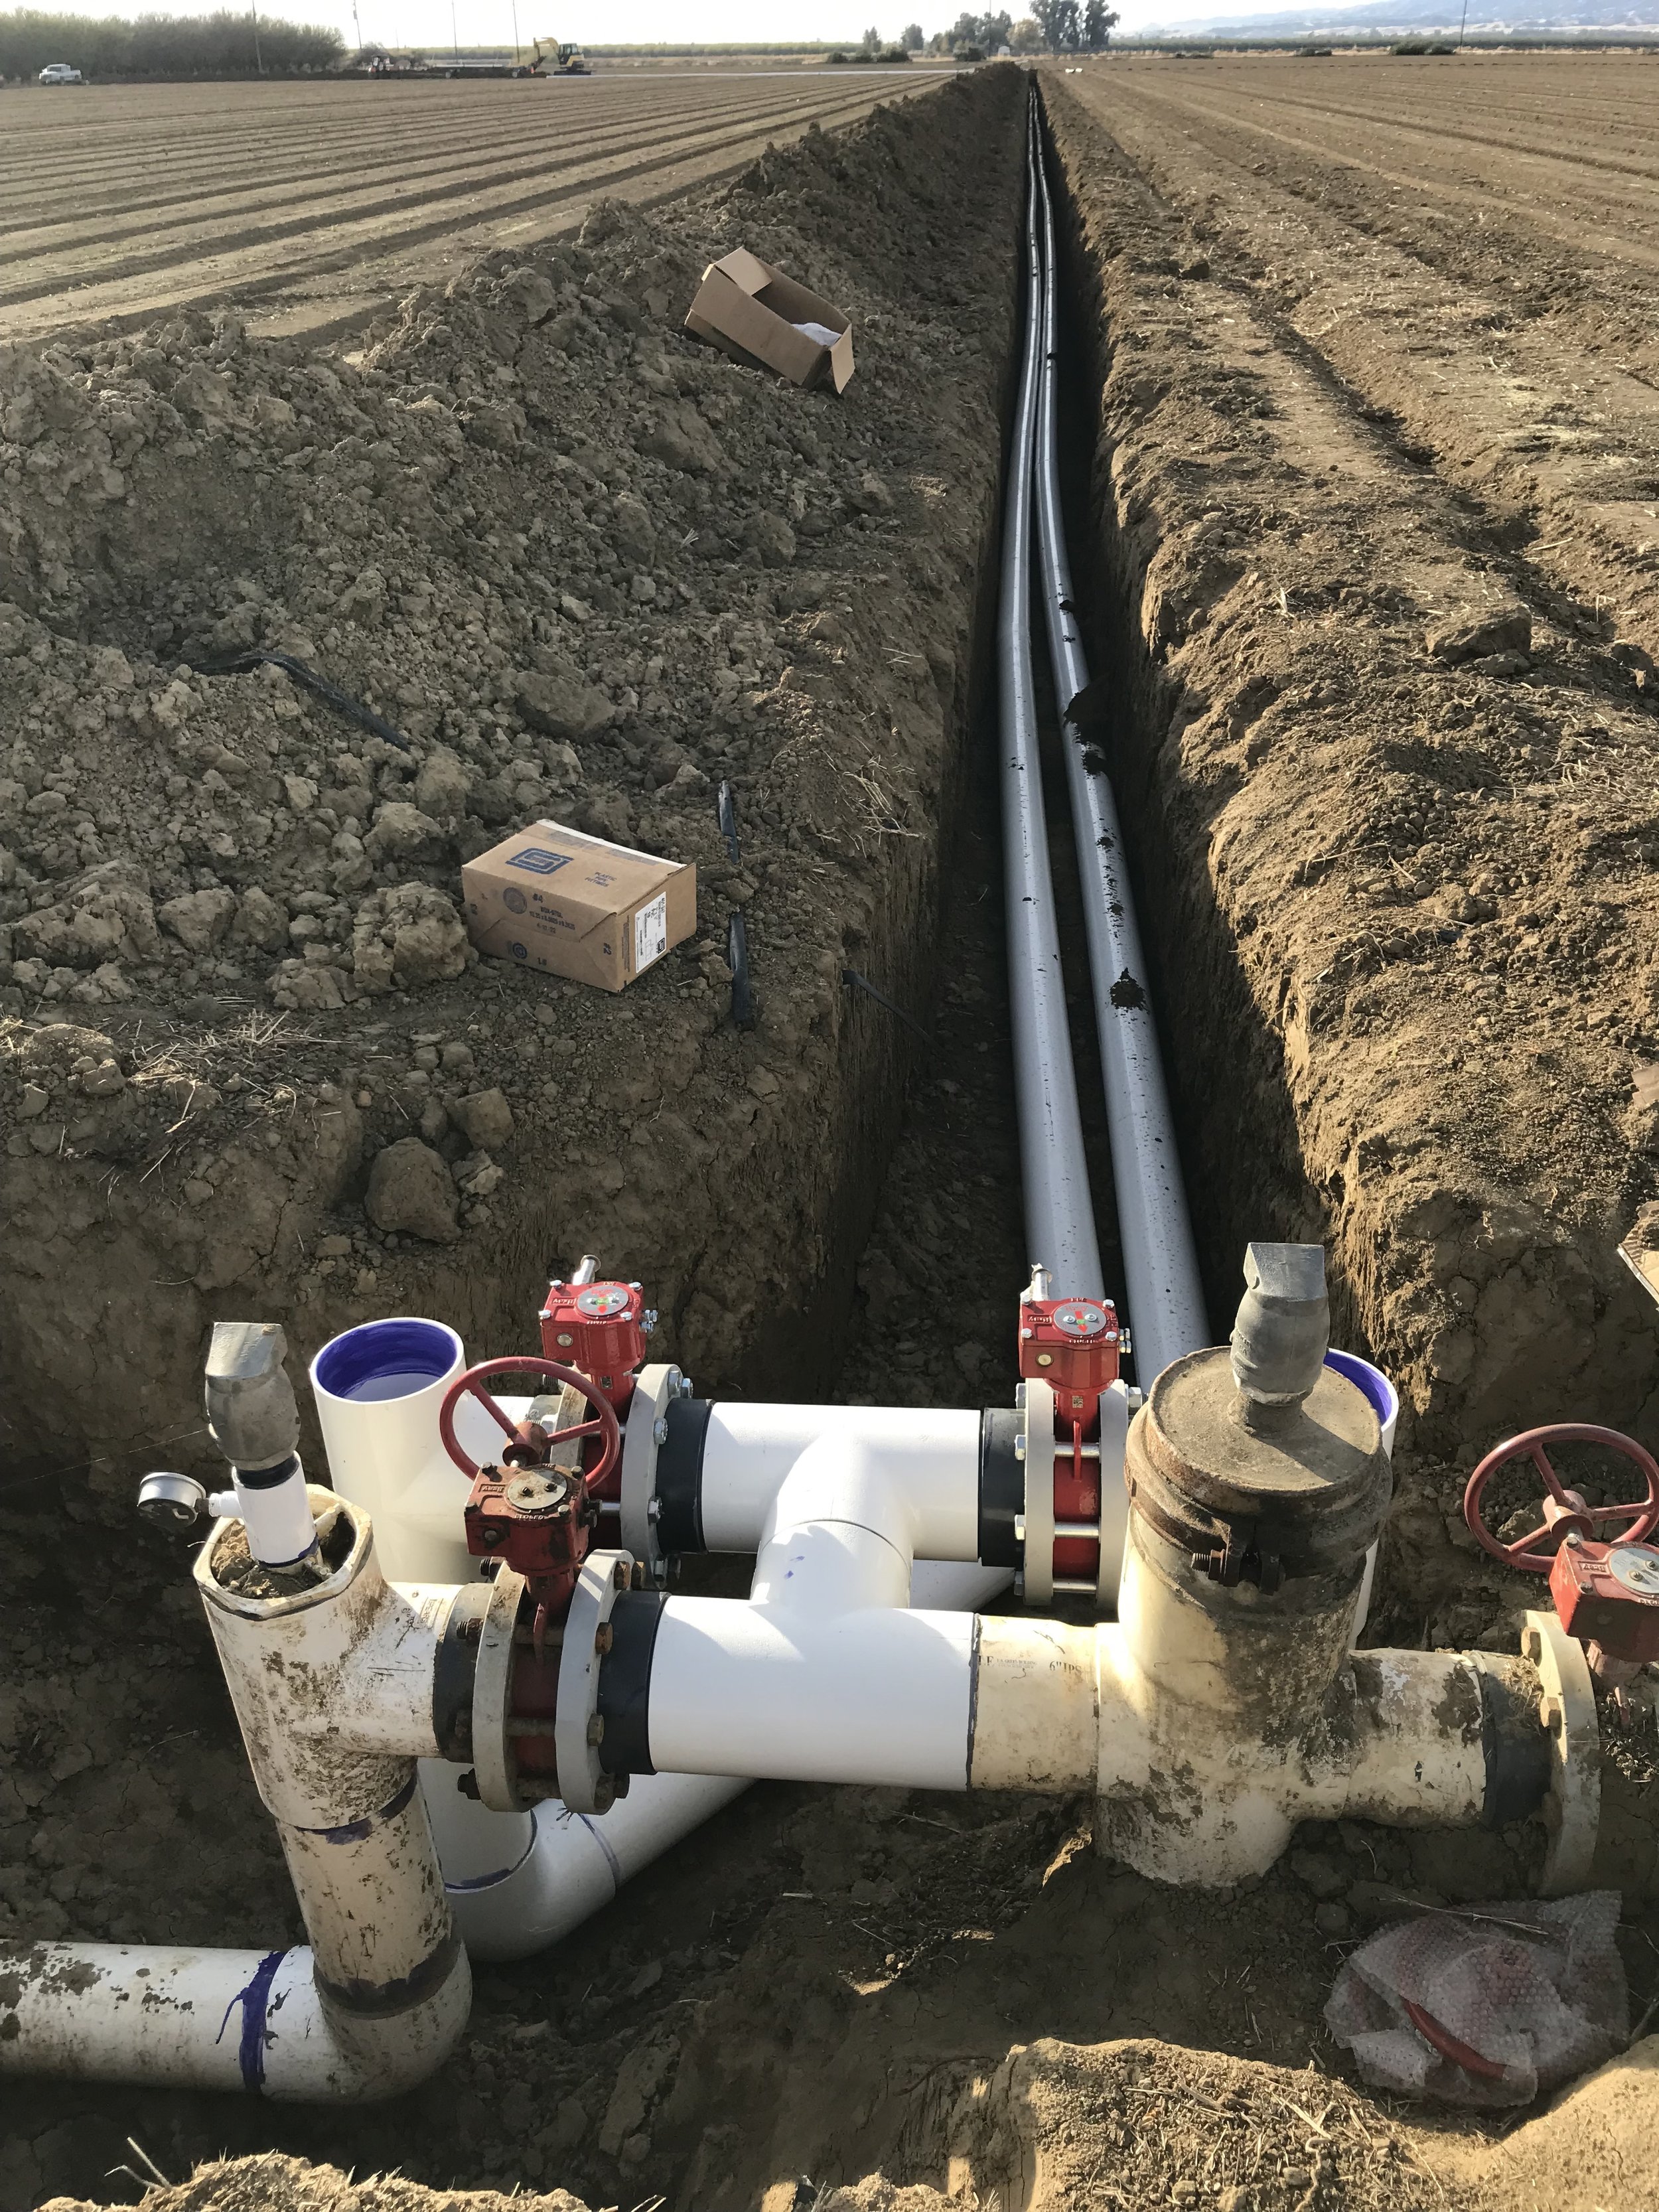
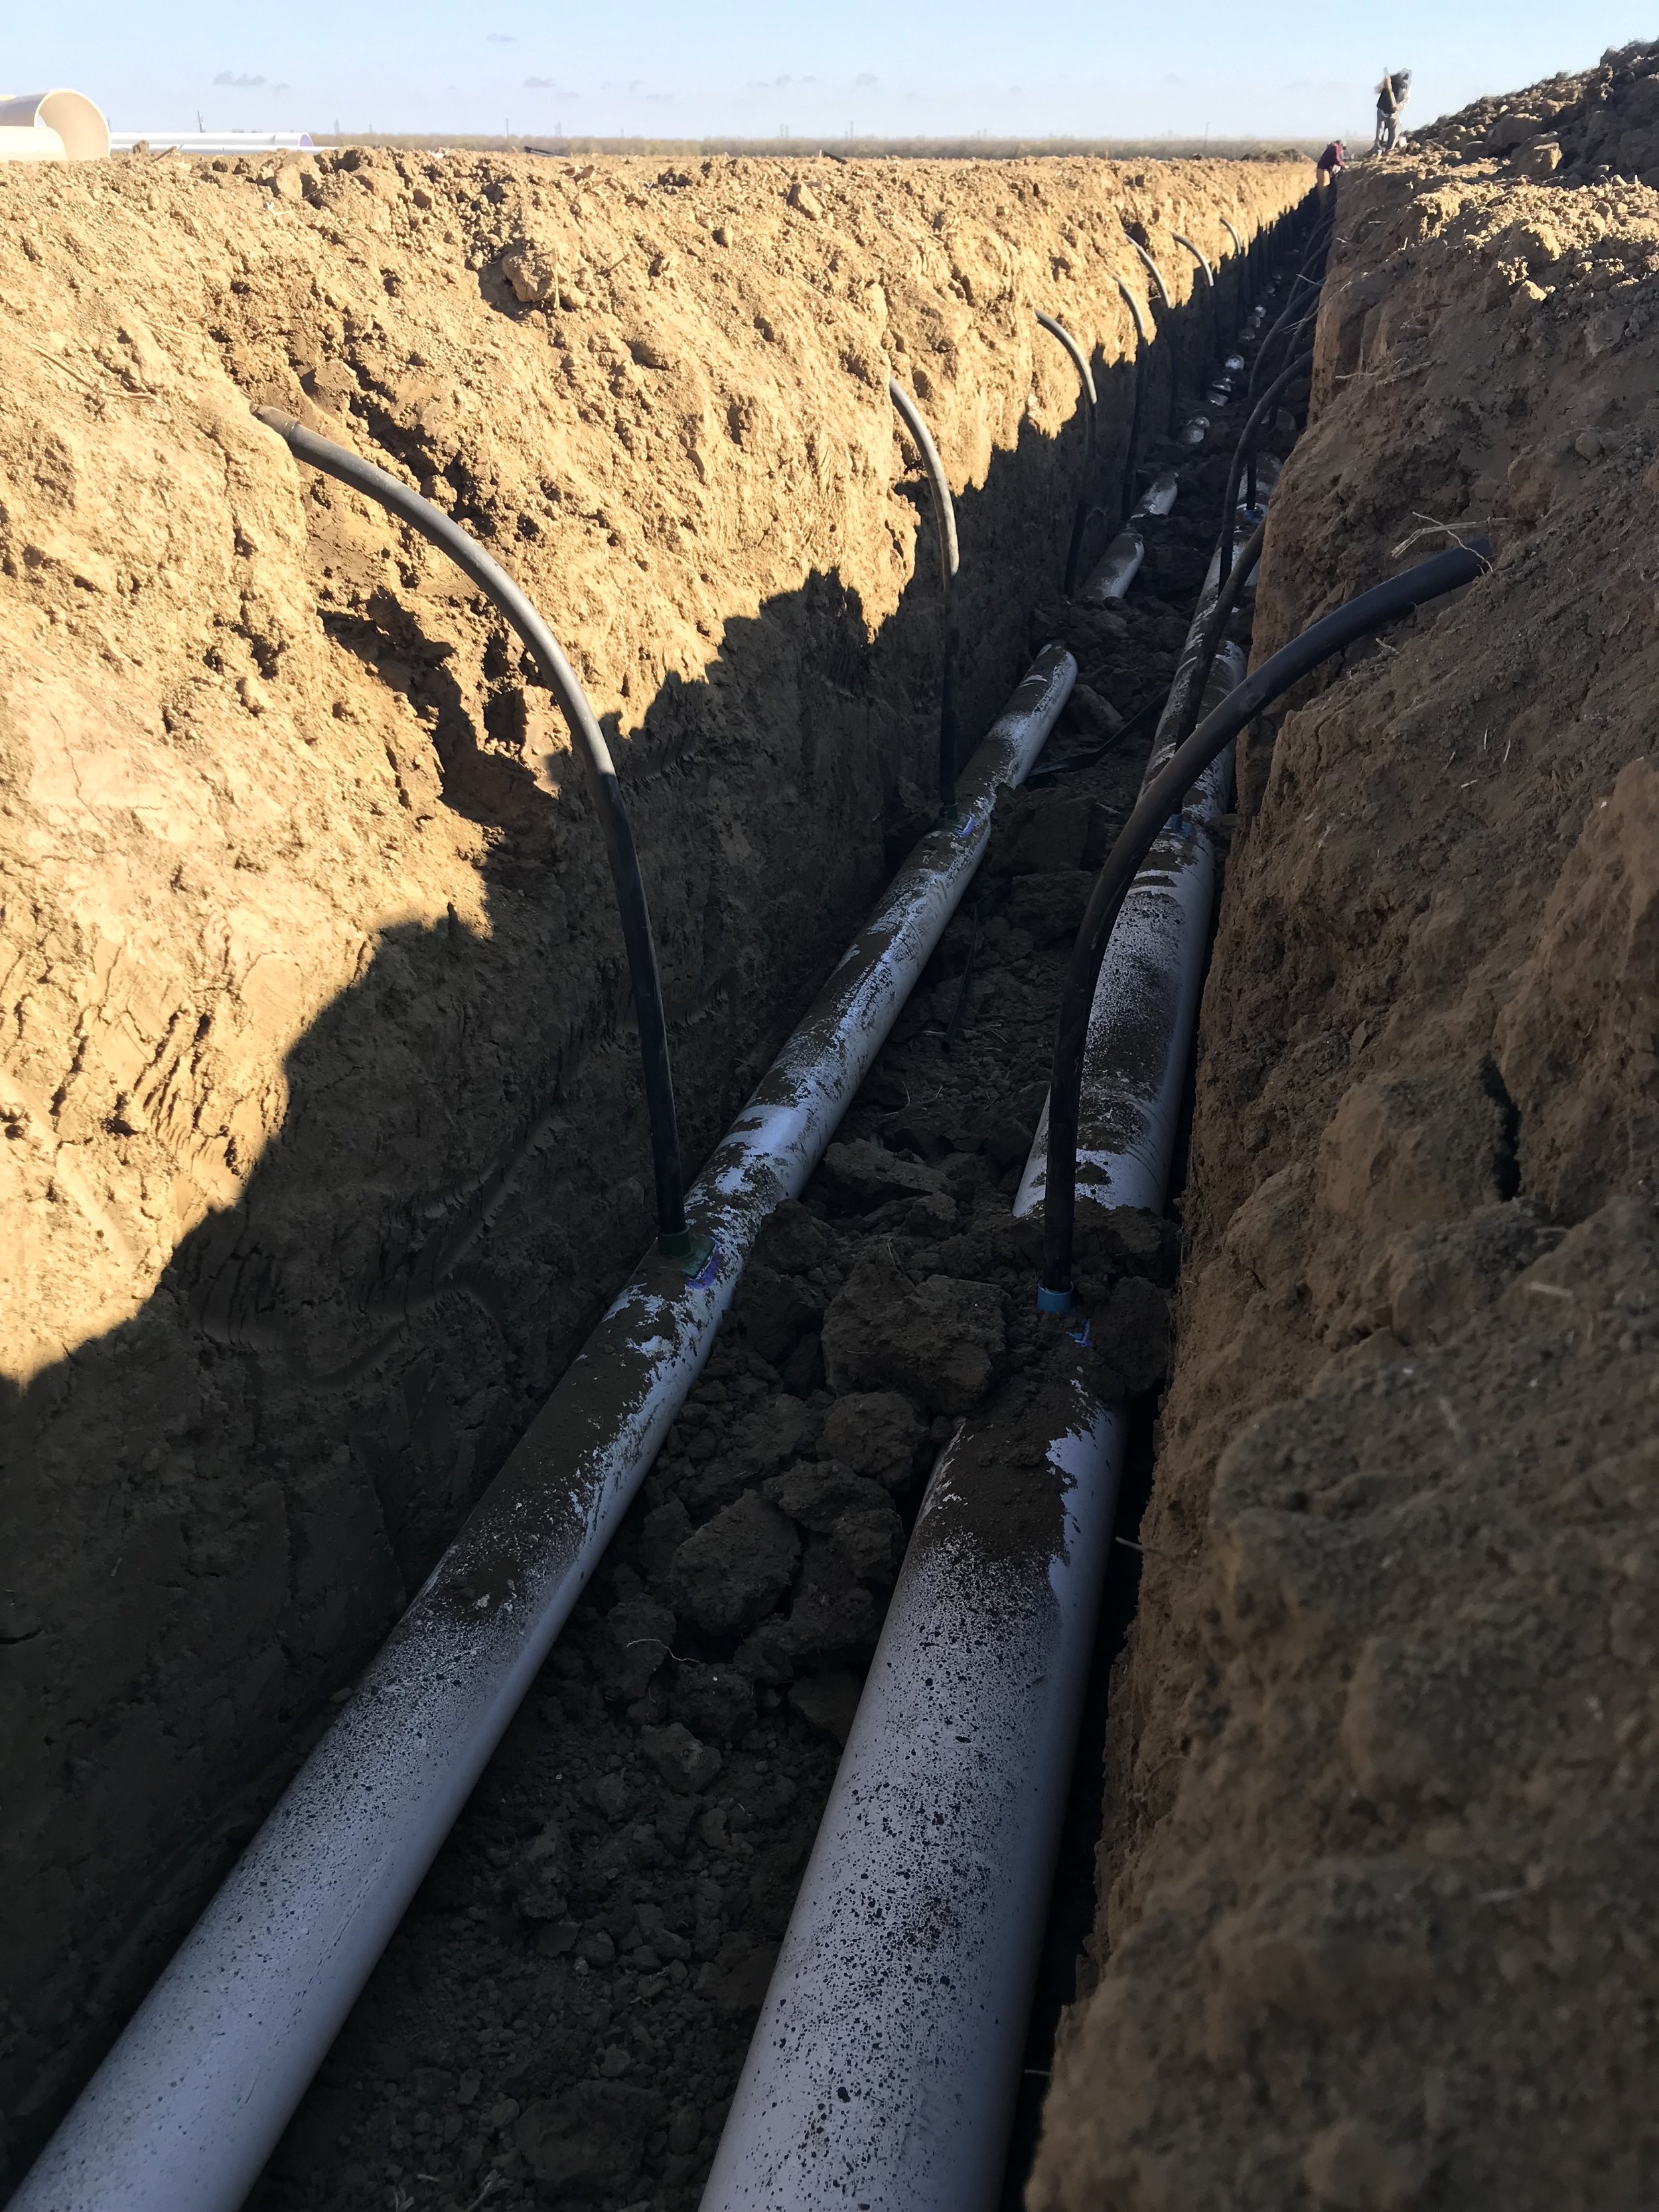
We farm on 60” beds (meaning there are 60” between the center of one bed to the center of the next bed), with one line of drip tape per bed – so, we drill a hole in the lateral mainline every 60”. But we’re not done yet! After the holes are made, a “saddle” is glued into place on each hole, which will then house a connection to a short piece of rubber tubing. Remember, the mainline is deeper than the drip tape, and drip tape doesn’t operate well when bent. Instead of connecting the mainline directly to the drip tape, we connect the main line to a length of rubber tubing (much more accommodating to the angles needed for the depth difference) that (finally) connects to the drip tape.
After we have the pipe laid out and glued together on top of the ground, we drill holes into the pipe where we will eventually connect the drip tape.
We farm on 60” beds (meaning there are 60” between the center of one bed to the center of the next bed), with one line of drip tape per bed – so, we drill a hole in the lateral mainline every 60”. But we’re not done yet! After the holes are made, a “saddle” is glued into place on each hole, which will then house a connection to a short piece of rubber tubing. Remember, the mainline is deeper than the drip tape, and drip tape doesn’t operate well when bent. Instead of connecting the mainline directly to the drip tape, we connect the main line to a length of rubber tubing (much more accommodating to the angles needed for the depth difference) that (finally) connects to the drip tape.
And, that’s still not all!
In any irrigation system, we need to consider drainage so that any excess water will flow out of the field (rather than create pooling and remain stagnant). In most situations, we can simply dig a shallow ditch that directs the water from the ends of the beds out of the field. When we add a mainline halfway down the lengths of the beds, this becomes a little more complicated (we can’t have a drainage ditch cutting through our beds).
So, with the second mainline, we added in an underground drainage line in the same trench (in the photo above, it’s the smaller pipe on the left). The process to install the drainage line was the same as the main line, but in reverse (the end of the drip tape connects to rubber tubing, which connects to a PVC pipe), using smaller piping that instead of bringing water from the mainline to the drip tape, takes the excess water from the drip tape out of the field.
Once everything is connected together, we do a quick test to check for leaks before covering it all up and effectively burying it. And now we have a new underground mainline and (hopefully) more efficient irrigation – the only current visual indicator being the vents popping up across the field.
After we had that project finished, we went back to the last of our regular winter welcoming tasks: planting peas, barley, and cover crops.The field we installed the mainline on was one of the last to be planted (because of the project). We put in a cover crop (in the photo below) that will grow until the spring, when we will mow it down and incorporate all that biomass into the soil to provide some homegrown fertility for our next crop of cherry tomatoes (which will be started in the greenhouse later this week!).

Recipes We’re Loving:
Ottolenghi recipes are known for their lengthy list of ingredients, but also their beautiful use of vegetables and fresh flavors. This recipe for winter squash with yogurt and a green chili sauce is no exception, but don’t let the ingredients scare you off. It comes together pretty quickly thanks to a food processor to make the green sauce and most of the ingredients are readily available at any regular grocery store. In the version linked here, the recipe calls for canned peppers, but you can also use fresh and adjust the quantities to suit your heat preferences.
Who doesn’t love a good sheet pan meal? Give this Roasted Squash and Tofu with Ginger and Garlic a try the next time you want an easy (yet delicious) weeknight meal. Or, just the next time you want something tasty (with ease)!
Amidst all the winter squashes, I’d be remiss not to include a green recipe! Last week I harvested some collard greens and made a hearty green pesto with them, which used as a pasta sauce (with a little parmesan, of course). But, I think the leftovers were even better: I made some “frizzled” butter beans (quick recipe below), and then tossed the leftover collard green pesto pasta in the pan with them to heat it back up. I plated the pasta with beans, and topped with some marinated sheep’s cheese and a squeeze of lemon juice and WOW it was delicious.
Frizzled Butter Beans:
This recipe is from Alison Roman’s Dining In
1 can of butter beans
1/4 cup olive oil
1 tsp pepper flakes (use less if you don’t like heat)
garlic, thinly sliced (6 cloves — use as much or as little as you like)
salt & pepper, to taste
Put all ingredients in a heavy-bottomed, medium sized, pan and bring up to a “sizzle,” stirring occasionally until the garlic becomes fragrant. Turn down heat to low and let cook for 15-20 minutes, until the beans are looking “frizzled” and browning nicely. Remove from heat, taste, and adjust seasoning to your liking.